“
When you’re building a new home on Oahu, thinking about solar panels and a battery system isn’t an afterthought—it’s a core utility, as essential as your plumbing and electrical. For an oahu new build solar project in 2026, you can expect to budget between $42,000 and $55,000 for a properly sized system on a standard 2,400 sq. ft. home. This isn’t just about slapping panels on a finished roof; it’s about integrating the entire energy system into your architectural plans from day one to navigate the complex realities of Honolulu’s Department of Planning and Permitting (DPP) and Hawaiian Electric’s (HECO) interconnection rules. Get this wrong, and you’re not just looking at delays; you could be facing a complete redesign.
For years, our team at Warrior Construction has been guiding homeowners through this process. It’s changed dramatically. The old days of simple grid-tied systems are long gone. Today, every new home we build with solar requires a battery. This is non-negotiable from HECO’s perspective. They need that storage to help stabilize the island’s grid, especially during the evening peak. This shift changes everything—from how you finance the project to where you physically locate the equipment in your home design.
In this guide, we’ll walk you through the real-world process we use for our clients. We’ll break down the true costs you should be budgeting for in your construction loan, demystify HECO’s new ‘Grid Stability Contribution’ program, explain how the solar plans affect your overall permit timeline with the Honolulu DPP, and detail the critical design specifications that must be in your blueprints before you ever break ground.
How much should I budget for solar and battery on a new Oahu home?
First things first, let’s talk numbers. The most common question we get from clients planning a new custom home is about the budget for solar. You need to think of this as a foundational cost, not an optional upgrade. For a typical new construction home on Oahu in 2026, a fully integrated solar PV and battery storage system will cost between $42,000 and $55,000. This is a real number you should be discussing with your lender as part of your total construction loan package.
Breaking Down the Numbers for a Typical Home
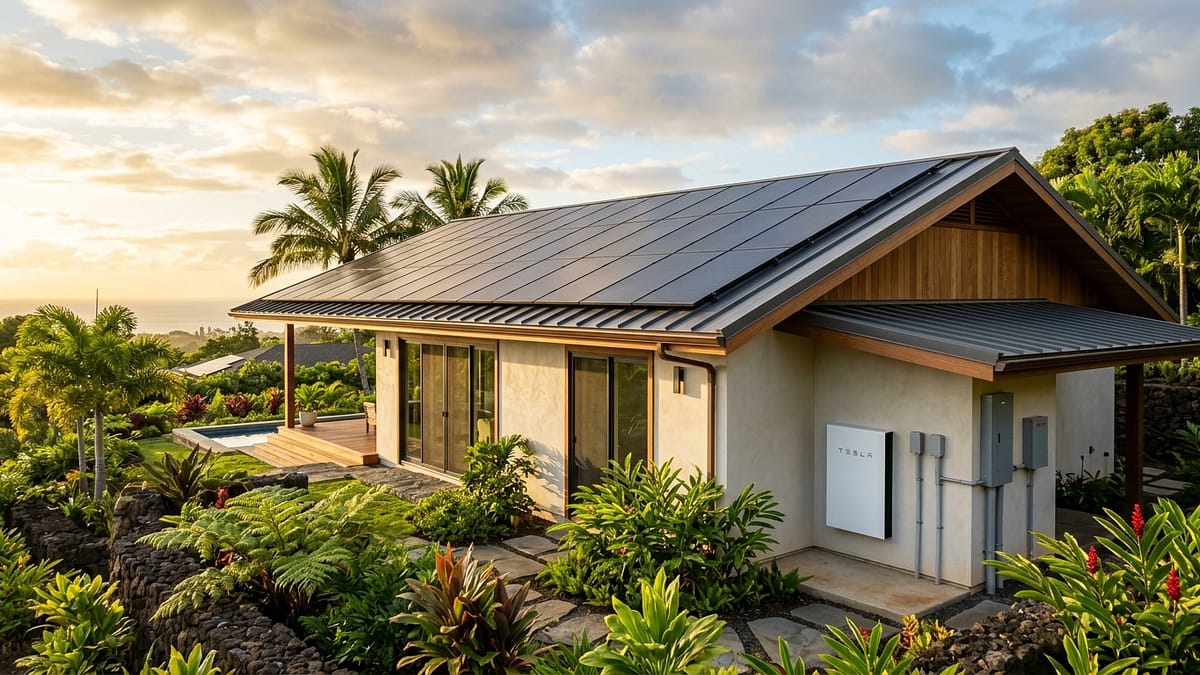
Let’s use a concrete example. We recently designed a 2,400-square-foot home for a client in Ewa Beach. Their energy needs dictated an 8-kilowatt (kW) photovoltaic (PV) array paired with a 15-kilowatt-hour (kWh) battery, like a Tesla Powerwall 3 or a bank of Enphase IQ 5P batteries. Here’s a rough breakdown of where that money goes:
- PV Panels (8kW): Approximately $9,000 – $11,000 for quality Tier 1 panels.
- Battery Storage (15kWh): This is the biggest single ticket item, running $16,000 – $19,000.
- Inverter & System Components: This includes the smart inverter, rapid shutdown devices, and monitoring hardware, costing around $5,000 – $7,000.
- Racking & Mounting Hardware: For Oahu’s salt air and hurricane codes, you need corrosion-resistant, high-wind-rated hardware, which adds about $3,000.
- Labor, Design & Engineering: The installation, electrical work, structural calculations, and permit package preparation typically costs $8,000 – $12,000.
- Permitting & HECO Fees: Budget around $1,000 – $2,000 for DPP and HECO application fees.
It’s important to understand that these numbers reflect current 2026 market conditions. A recent Q2 forecast from the University of Hawaii Economic Research Organization (UHERO) confirmed what we’re seeing on job sites: while panel prices are stable, the costs for batteries and smart inverters have jumped about 8% in the past year.[1] This is largely due to increased demand and the ongoing shipping bottlenecks that affect everything coming into the islands.
Why This Needs to Be in Your Construction Loan
Years ago, a solar system was something homeowners might add a few years after moving in, often financed separately. That approach is no longer viable for new construction. Because HECO now requires a battery for any new system interconnection, solar has become an integral part of the home’s essential infrastructure. Lenders get this. They understand that a home with a modern, resilient energy system is more valuable and that the owners will have lower, more predictable monthly expenses.
Furthermore, building it in from the start is far more cost-effective. We can run conduit through the walls during framing instead of on the exterior later. We can design the roof structure from the beginning to handle the specific load and layout of the panels. We can allocate a dedicated, properly ventilated space for the battery and inverter in the garage or a utility room. Trying to retrofit all of this into a brand-new, finished home would easily add 15-20% to the total system cost and involve a lot of unnecessary cosmetic repairs.
Most importantly, when you roll the cost into your primary construction loan, you’re financing it over 30 years at a mortgage rate, rather than a shorter-term, higher-interest personal loan. This makes the monthly financial impact much more manageable and allows you to build a resilient, energy-independent home from the day you get the keys.
What is the HECO interconnection process for new construction?
Navigating the Hawaiian Electric interconnection process is a critical path item for any new home build that includes solar. It’s a formal, multi-step review that happens in parallel with your building permit process. The key takeaway for 2026 is that HECO’s rules are all about grid stability. They are not just approving your ability to generate power; they are dictating how your system must behave as a citizen of the larger island grid.
Goodbye ‘Battery Bonus,’ Hello ‘Grid Stability Contribution’
Homeowners who installed systems a few years ago might talk about the “Battery Bonus” program. That program is over. The new standard for all residential systems is the ‘Grid Stability Contribution’ tariff. As a recent report from the Department of Business, Economic Development & Tourism (DBEDT) highlights, this program is central to Hawaii’s strategy for integrating more renewables without destabilizing the grid.[2]
Here’s what it means for you in practical terms:
- Battery is Mandatory: You cannot get an interconnection approval for a new home without a battery. HECO requires the ability to store your daytime solar generation for use during the evening peak (5 pm to 9 pm).
- HECO Can Control Your Battery: By enrolling in this tariff, you give HECO the ability to draw power from your battery during grid emergencies or periods of extremely high demand. This is typically done through the software in your smart inverter.
- You Get a Small Bill Credit: In exchange for providing this grid service, you receive a modest monthly credit on your electric bill. Right now, that credit is hovering around $10 to $15.
The real financial benefit isn’t the small credit. The benefit is that having the battery allows you to store your own cheap, clean solar power and use it at night instead of buying expensive electricity from HECO. This strategy, known as “self-consumption,” is where the major savings are. The Grid Stability Contribution program is simply the ticket you need to get your system legally connected to the grid.
The HECO Inspection and Certification Process
Getting approval from HECO isn’t just a matter of paperwork. It’s a technical verification process. Our team handles this for our clients, but it’s good for homeowners to understand the steps:
- Step 1: Interconnection Application: We submit a detailed application package with the system design, one-line electrical diagrams, and equipment specifications before construction even starts.
- Step 2: Conditional Approval: HECO reviews the plan to ensure it meets all technical requirements. Once they issue a conditional approval, we know the design is acceptable and can proceed with installation as part of the home’s construction.
- Step 3: Installation & Electrical Inspection: After the system is installed and the home’s electrical system is complete, the city inspector signs off on the electrical permit.
- Step 4: HECO Verification and Commissioning: This is a crucial step. A HECO technician comes to the site to physically inspect the installation. They verify that the equipment matches the approved plans and that all safety features are working. They also test the software to ensure it’s correctly programmed for the Grid Stability Contribution tariff. We had a project in Kailua delayed by two weeks because a third-party installer used a different inverter model than what was on the approved plan, forcing a resubmission.
- Step 5: Permission to Operate (PTO): Only after the HECO field inspection is passed do you receive the final “Permission to Operate” letter. You cannot legally turn your system on and export power to the grid until you have this document in hand.
This entire process, from application to PTO, can take several months and must be carefully coordinated with the overall construction schedule.
How does solar affect my Honolulu new build permit timeline?
This is where planning an oahu new build solar system from the beginning pays huge dividends. Many homeowners mistakenly believe the solar permit is a separate, quick process. For a new build, it’s the exact opposite. Your solar system design is a fundamental part of your master building permit application, and it’s scrutinized just as closely as your foundation or framing plans.
It’s Not a Separate Permit; It’s Part of the Master Plan
When we submit a new home project to the Honolulu Department of Planning and Permitting (DPP), the solar plans are fully integrated into the architectural and electrical drawing sets. This means:
- The architectural plans must show the exact location and dimensions of the panels on the roof, as well as the location of the battery and inverter equipment.
- The structural plans must include calculations from a licensed structural engineer proving that the roof trusses or rafters can support the added weight (dead load) of the panels and racking, plus withstand the wind uplift forces required by our hurricane code.
- The electrical plans must include a detailed one-line diagram of the entire PV system, showing how it connects to the battery, inverter, and the home’s main electrical panel.
Because it’s all one package, a mistake in the solar design can get the *entire* building permit application rejected. This isn’t like a standalone permit where you can just correct one drawing. A rejection means your whole project goes to the back of the line, potentially adding months to your start date.
The 110-140 Day Reality at the DPP
Let’s be blunt about the timeline. As of 2026, we are seeing an average review time of 110 to 140 days for a new single-family home permit at the Honolulu DPP.[3] This is the time from when we submit a complete and perfect application to when we have the approved permit in hand. That four-month window is the best-case scenario.
During this period, your plans are circulated to multiple departments for review: structural, electrical, plumbing, and zoning. Each one gets a chance to review and comment. The DPP’s electrical reviewers are particularly stringent about the solar plans. They are checking for compliance with the latest National Electrical Code (NEC) and any local amendments. They will verify conductor sizes, overcurrent protection, and proper grounding.
Consequently, our design process is incredibly meticulous upfront. We double-check every detail before submission because we know the cost of a mistake isn’t just a correction fee; it’s a three-month delay. The key is to treat the solar system with the same level of planning and engineering rigor as the home’s foundation. It has to be right the first time.
What are the critical design rules for an integrated solar system?
Getting the design right from the very first sketch is everything. When solar is integrated into a new home, we have a unique opportunity to make the system more efficient, safer, and aesthetically pleasing than any retrofit. But it means the architect, engineer, and our construction team have to be on the same page about a few non-negotiable rules.
The 3-Foot Fire Code Setback That Derails Permits
This is one of the most common and costly mistakes we see from designers who aren’t familiar with Honolulu’s specific codes. The fire code mandates a minimum 3-foot clearance between any battery energy storage system (BESS) and any adjacent windows, doors, or building ventilation intakes. We’ve seen projects in Manoa and Hawaii Kai get their permits kicked back because the architect placed the batteries on a garage wall right next to a side door. It seems like a small detail, but it’s a hard-and-fast safety rule that the DPP enforces without exception.[3] Moving that battery location after the fact can require significant changes to the electrical plan, triggering a full resubmittal and restarting that 140-day permit clock.
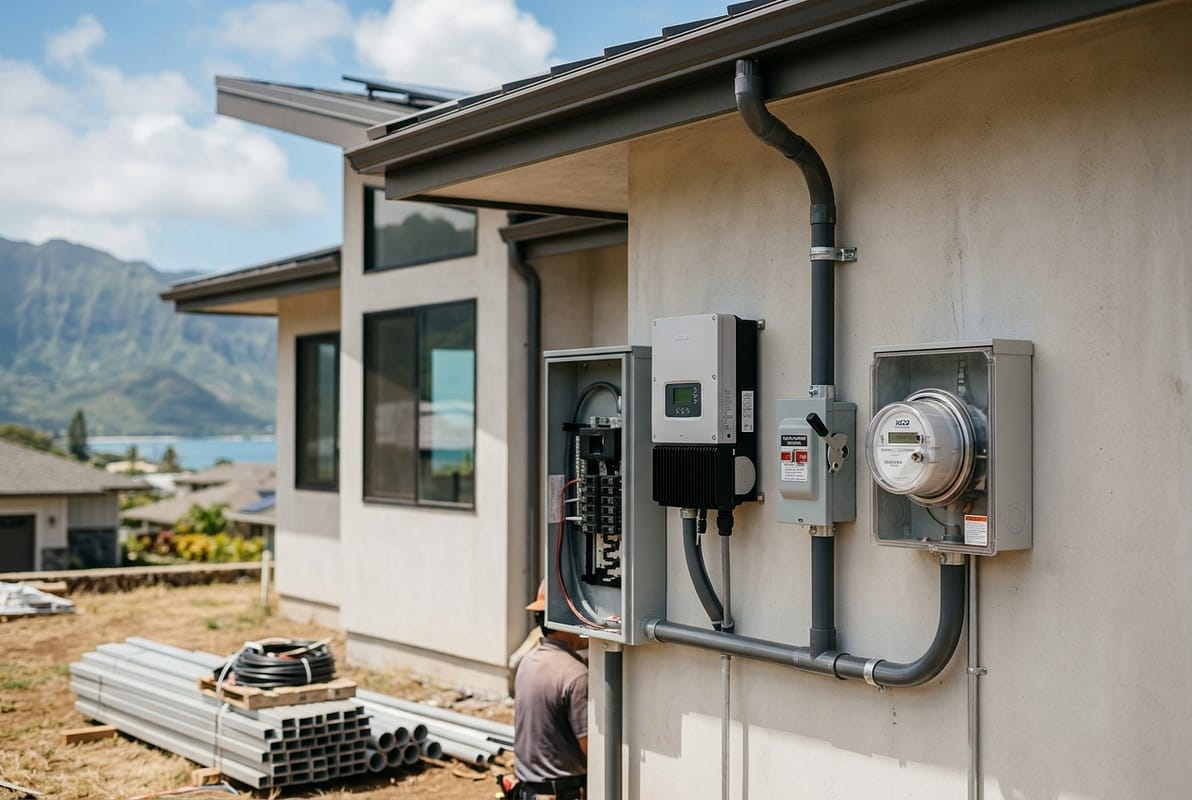
Planning Your Electrical Room and Conduit Runs Early
A modern solar-plus-storage system is more than just a few electrical boxes. It’s a significant piece of equipment that requires dedicated, well-ventilated space. For a typical 15-20 kWh system, you need a wall space that’s roughly 6 feet wide and 8 feet tall. The equipment includes:
- The battery units themselves (e.g., two Tesla Powerwalls).
- The system inverter.
- The system controller or “gateway.”
- An additional electrical subpanel for the backed-up circuits.
- Safety disconnect switches.
During the design phase, we work with the architect to designate this “energy wall,” usually in the garage. We make sure it’s not in direct sunlight and has adequate ventilation to keep the electronics cool. Most importantly, we plan the conduit runs. We design pathways inside the walls for the electrical conduits to run cleanly from the roof array down to the energy wall and from there to the main electrical panel. This keeps everything hidden and protected, rather than having ugly metal conduit snaking across your new exterior walls—a dead giveaway of a poorly planned system.
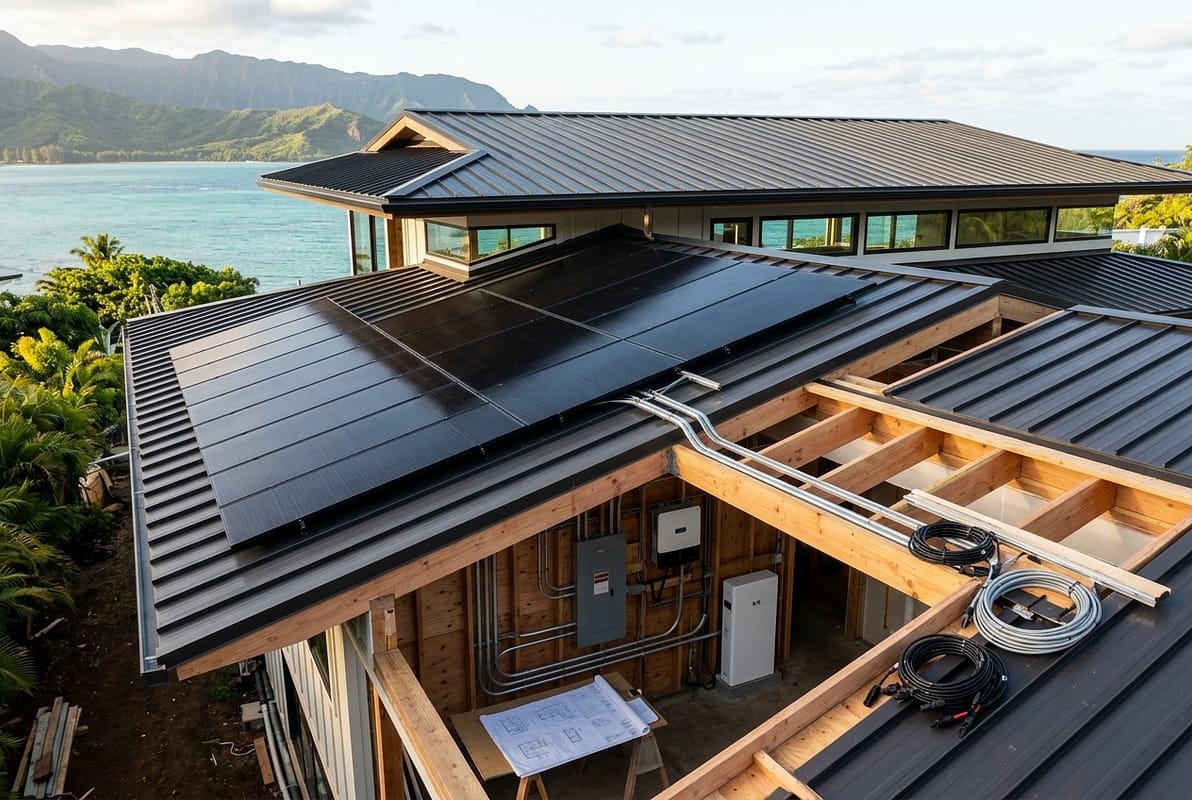
Designing the Roof for Panels, Not Just Rain
The roof is the most valuable real estate for your home’s power plant. Instead of just designing a roof and then trying to figure out where to put panels, we reverse the process. The solar array layout helps inform the final roof design.
Key considerations include:
- Orientation and Pitch: We maximize the number of roof planes facing south or west to capture the most sunlight. We also avoid overly complex roof designs with lots of small hips and valleys that break up the available space. A large, simple shed or gable roof is often the most effective platform.
- Obstruction-Free Zones: We work with the architect and mechanical engineer to locate all roof vents, plumbing stacks, and skylights *outside* of the prime solar areas. Nothing is worse than having a perfectly good roof plane made unusable by a single sewer vent placed in the middle.
- Structural Integrity: As mentioned, the roof structure is engineered from the start to support the panel load. This is especially important for homes using modern truss systems. We ensure the truss design accounts for the specific point loads where the solar racking will attach.
- Material Selection: We often recommend standing seam metal roofs for new builds with solar. The racking can clamp directly to the seams without making a single penetration through the roof deck, dramatically reducing the long-term risk of leaks. While the upfront cost is higher than asphalt shingles, the durability and peace of mind are well worth it, especially in our rainy climate. Getting this level of detail right requires a truly collaborative custom home design process.
By baking these considerations into the initial blueprints, the solar array becomes a seamless, integrated part of the home’s architecture, not a clunky addition.
Case Study: A Resilient Custom Home in Kapolei
To see how these principles come together, let’s look at a project we recently completed for the Tanaka family, who were doing a teardown and rebuild in Kapolei. Their goal was a modern, energy-efficient home that could ride out a hurricane or grid outage without skipping a beat.
The Project: A 2,600 sq. ft., single-story custom home designed for multigenerational living.
The Challenge: The family wanted to run two split-AC systems, an electric vehicle charger, and essential medical equipment, all while keeping their HECO bill as low as possible and having complete backup power.
The Integrated Solution:
- System Sizing: We worked with our energy consultant to model their expected usage. The final design was a 10kW PV array paired with 25kWh of battery storage using two Enphase IQ 5P batteries and a system hub.
- Design Integration: From the very first floor plan, we allocated a 10-foot section of wall in the garage for the full energy system. The architect designed a simple, south-facing gable roof with no vents or obstructions, providing a perfect platform for the 25 solar panels. The structural engineer specified beefier trusses for that roof section to handle the load and hurricane-force winds.
- Budgeting & Financing: The total system cost came to $62,000. We worked with their lender, American Savings Bank, to ensure this was fully included and understood as a core component of the home in the construction loan package. The appraisal explicitly noted the value of the resilient energy system.
- Permitting & Interconnection: Because all the solar details were perfectly integrated into the master permit set—including the 3-foot fire code setback for the batteries—the application sailed through the DPP review in 125 days. The HECO interconnection application was submitted simultaneously, and we received Permission to Operate within two weeks of the final electrical inspection.
The Outcome: The Tanaka family now lives in a home where their average monthly HECO bill is just the minimum service charge, around $25. During a recent island-wide outage, their lights didn’t even flicker as the system seamlessly switched to battery power. They can charge their EV with sunshine and have the peace of mind that their essential medical devices will always have power. This is the new standard for building on Oahu.
What this means for Hawaii homeowners
Building a new home on Oahu in 2026 with an integrated solar and battery system is a complex but incredibly rewarding process. It requires a fundamental shift in thinking: energy is no longer just something you get from a utility pole; it’s an asset you design, build, and manage as part of your home. It’s a core piece of your home’s resilience and long-term value. Planning is paramount.
Here are the actionable takeaways for anyone starting this journey:
- Hire a True Design-Build Team: Find a contractor and architect who have extensive, recent experience with integrated PV and battery systems in Honolulu. They must understand the nuances of the DPP review process and HECO’s latest technical requirements. Don’t let your project be their learning experience.
- Budget for It as a Utility: Include the full $42,000 to $55,000+ cost in your initial construction budget and financing discussions. Treating it as a core utility, like your water line, is the correct framing for you, your architect, and your lender.
- Design for Solar First: Your home’s roof orientation, structural capacity, and electrical layout should be designed around the needs of the solar and battery system, not the other way around. Insist that your design team prioritizes this from the earliest concept sketches. This proactive approach is a cornerstone of our construction process.
- Be Patient and Prepared: Understand that the 110-140 day permit timeline is real. The best way to navigate it is with a perfect application, submitted by a team that knows exactly what the DPP plan reviewers are looking for.
Building a new home with an integrated energy system gives you control over your power costs and security during outages. It’s a smart investment that pays dividends for decades, but it absolutely must be planned correctly from the start.
Frequently Asked Questions
Can I still install a new solar system on Oahu without a battery in 2026?
No. For any new residential system connecting to the grid on a new build, Hawaiian Electric’s current interconnection tariffs make a battery energy storage system mandatory. The grid is at capacity for simple daytime energy export, so HECO requires new systems to store their energy for self-consumption during the evening peak. This is a non-negotiable part of their “Smart Power for Oahu” program.
How much will the ‘Grid Stability Contribution’ program actually save me each month?
The direct bill credit from HECO for participating in the Grid Stability Contribution program is modest, typically between $10 and $15 per month. The real financial savings come from “self-consumption”—using your stored solar energy at night instead of buying it from HECO. That strategy can save you hundreds of dollars per month, effectively reducing your bill to the minimum monthly service charge.
What happens if my solar plans get rejected by the Honolulu DPP?
If the solar portion of your new build plans is rejected, the entire building permit application is sent back for corrections. You don’t just fix the solar drawings; you have to resubmit the entire package. This unfortunately means your project goes to the back of the queue, and that 110-140 day review clock starts all over again. This is why getting every detail right on the initial submission is so critical.
Are solar roof tiles (like the Tesla Solar Roof) a good option for a new build in Hawaii?
While the aesthetics are appealing, solar roof tiles currently present challenges in Hawaii. The upfront cost can be significantly higher—sometimes 50-75% more—than a traditional roof with high-efficiency panels. Furthermore, long-term durability in our salty, humid environment is still being proven, and finding certified local installers for warranty and repair work can be difficult. For most of our new build projects, a high-quality standing seam metal roof with traditional panels offers the best balance of cost, performance, and proven durability.
Does adding a $50,000 solar and battery system increase my property taxes?
No, this is a great benefit for Hawaii homeowners. The State of Hawaii provides a 100% property tax exemption for the value added by a renewable energy system. This means that while your home’s market value increases significantly with the addition of a PV and battery system, your assessed value for property tax purposes will not increase due to that specific improvement.
What’s the difference between AC-coupled and DC-coupled battery systems for a new home?
In a new build, we almost always recommend a DC-coupled system (like the Tesla Powerwall 3). In this setup, the solar energy goes directly from the panels to the battery in DC power, which is more efficient as it avoids converting from DC to AC and back again. AC-coupled systems (like older Powerwalls or Enphase batteries) are better for retrofitting onto an existing solar array but are less efficient for a ground-up installation where everything is designed together.
How much backup power do I really need for my Oahu home?
This depends entirely on what you want to run during an outage. A single 15 kWh battery can typically run essential loads like your refrigerator, lights, internet, and medical devices for 12-24 hours. If you want to run central AC or an EV charger, you’ll need a larger battery bank of 25-30 kWh. As part of our new home construction planning, we conduct a detailed load calculation to help you size the battery correctly for your family’s specific needs.
Start Your Oahu New Build on the Right Foundation
Planning a new home on Oahu is a journey, and integrating a resilient energy system from day one is the key to creating a modern, valuable, and future-proof property. Getting the strategy right involves navigating complex permits, specific engineering, and a deep understanding of Hawaii’s unique energy landscape. Our team at Warrior Construction specializes in this integrated approach.
If you’re ready to build a home that’s designed for energy independence from the ground up, contact our team. Let’s discuss your vision and how we can make it a reality.