Finding the right concrete contractor in Hawaii Kai means understanding that projects here—from driveways to foundations—cost around $22-$28 per square foot for standard flatwork and can take 3-5 months from start to finish, including permits, in 2026. It’s not just about pouring cement; it’s about building structures that can withstand our unique island environment. The combination of salt-laden air, expansive volcanic soil, and strict hurricane building codes makes concrete work in this part of O’ahu a specialized craft. As a general contractor with over two decades of experience on the ground here, our team at Warrior Construction has seen it all, from spalling retaining walls in Portlock to cracked driveways in Koko Marina.
Many homeowners underestimate the complexities involved. They see a simple driveway pour and think it’s a weekend job. But the reality is that a properly executed concrete project is the literal foundation of your home’s value and safety. A poorly mixed batch, improperly placed rebar, or a failure to account for drainage can lead to catastrophic failures and tens of thousands of dollars in repairs down the line. We’ve been called in to fix those mistakes more times than I can count. That’s why we put together this guide. We want to pull back the curtain and show you what goes into professional concrete work in our community.
This article will give you the inside track. We’ll break down the real costs you can expect in 2026, navigate the frustrating Honolulu permitting process, and explain the specific environmental challenges we face in Hawaii Kai. We will also provide a real-world project example, explain how to vet a contractor properly, and answer the most common questions we hear from your neighbors. By the end, you’ll have the knowledge to make an informed decision and ensure your project is built to last a lifetime.
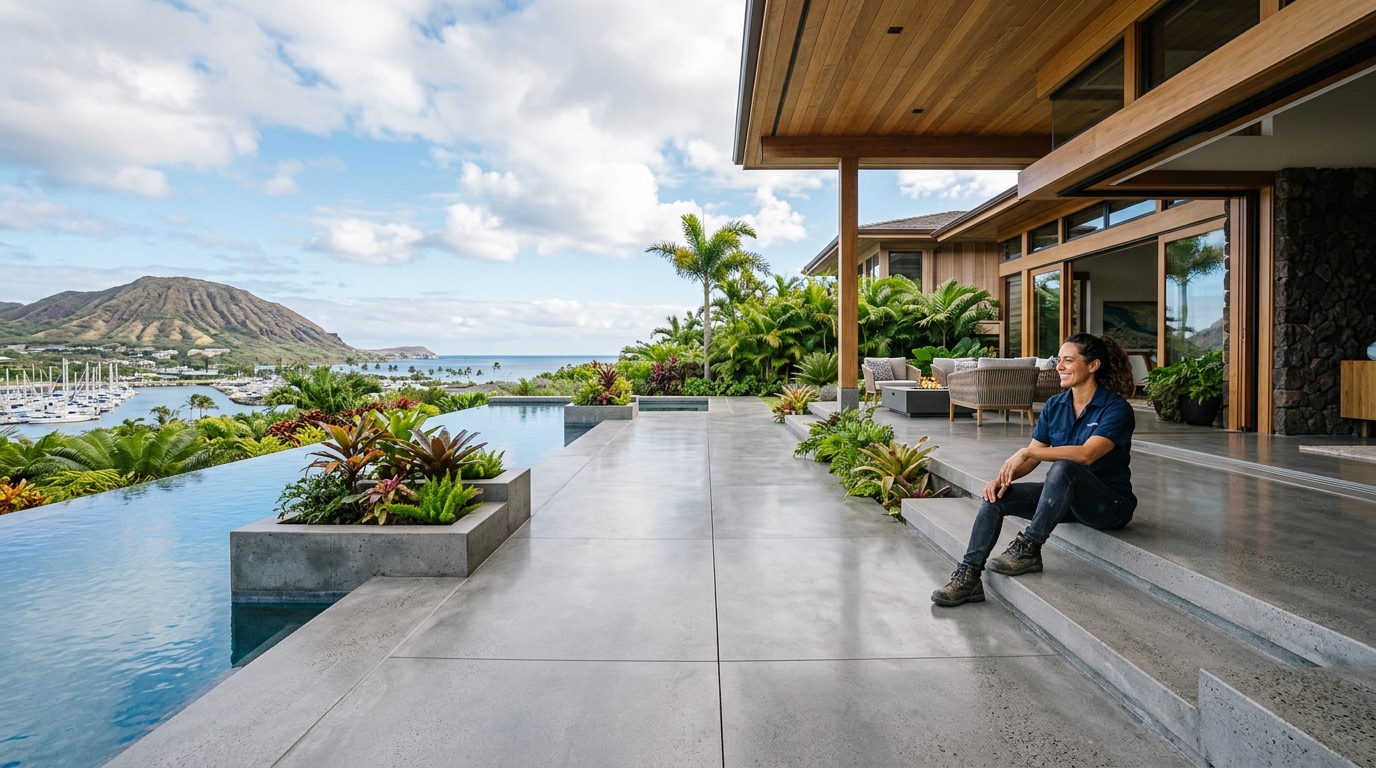
Why Hawaii Kai Homeowners Trust Warrior Construction for Concrete Contractor
When you’re investing in a significant project like a new foundation, driveway, or retaining wall, trust is everything. In a place as tight-knit as East Honolulu, a contractor’s reputation is built one job at a time, and it’s something we’ve been building at Warrior Construction for over 20 years. Homeowners in Hawaii Kai, from Hahaione to Portlock, choose us because we’re not just a company with a license; we’re part of the community. We understand the unique building challenges and lifestyle of this area because we live and work here, too.
Our approach is rooted in a deep understanding of local conditions. For example, we know that the proximity to the marina and the ocean means a higher concentration of airborne salt. Consequently, for any structural concrete work, we don’t just use standard rebar. We specify epoxy-coated or galvanized steel reinforcement and often recommend a concrete mix with a lower water-to-cement ratio and corrosion-inhibiting admixtures. This isn’t an upsell; it’s the correct way to build in a marine environment to prevent premature spalling and degradation. It’s a level of detail that a less experienced, off-island, or mainland-focused firm might completely overlook, leading to major problems in 5 to 10 years.
Furthermore, our experience extends to navigating the specific terrain of Hawaii Kai. We’ve engineered and built complex retaining walls on the steep slopes of Mariner’s Ridge and laid foundations on the expansive clay soils near Koko Head. Just last year, on a project in Queen’s Gate, we encountered a high water table that required a dewatering plan and a specially designed vapor barrier system beneath the slab. This is the kind of boots-on-the-ground problem-solving that only comes from years of local experience. We anticipate these issues during the preconstruction phase, saving our clients time, money, and headaches. Our deep familiarity with the Honolulu Department of Planning and Permitting (DPP) also means we know how to prepare and submit plans that get approved without endless rounds of revisions, which can stall a project for months.
At Warrior Construction, our process is transparent and client-focused. Here’s what sets us apart:
- Local Expertise: We understand Hawaii Kai’s microclimates, soil conditions, and specific building codes. We know what it takes to build structures that endure salt spray, tropical storms, and the intense UV exposure.
- In-House Team: We employ a dedicated team of skilled tradespeople, from form setters to finishers. This gives us greater control over quality and scheduling, unlike contractors who rely entirely on a rotating cast of subcontractors.
- Transparent Bidding: Our estimates are detailed and comprehensive. We break down costs for materials, labor, equipment, and permits, so you know exactly where your money is going. No surprises or hidden fees.
- Proven Track Record: With a valid BC-34373 license and a portfolio of successful projects across O’ahu, we stand behind our work. We’re proud of the homes and structures we’ve built and are happy to provide references from your neighbors in Hawaii Kai.
Choosing a contractor is about more than just the lowest bid. It’s about finding a partner you can rely on to protect your investment and deliver a final product that enhances your home and lasts for decades. Let our team show you the difference that local expertise makes.
What Does Concrete Contractor Cost in Hawaii Kai?
Let’s get straight to the point, because this is the first question every homeowner asks. In 2026, the cost for professional concrete work in Hawaii Kai is significantly higher than mainland averages due to island logistics. Everything from the aggregate and cement to the rebar and formwork has to be shipped in, and those costs are passed on. For a standard 4-inch thick, broom-finished concrete slab, like for a driveway or patio, you should budget between $22 and $28 per square foot. For a 500-square-foot driveway concrete Hawaii Kai project, this translates to $11,000 to $14,000.
However, that’s just a baseline. The final price tag can be influenced by several factors specific to your property. It’s critical to understand what drives these costs up or down. Here’s a detailed breakdown of the components that make up the total cost:
Key Cost Factors for Hawaii Kai Concrete Projects
- Site Preparation & Demolition: If we’re replacing an old, cracked driveway, the cost to break up and haul away the old concrete is a major factor. Disposal fees at O’ahu’s landfills are steep. Expect to add $3-$5 per square foot for demolition and removal. Site access also matters. A property on a narrow lane in an older part of Hawaii Kai might require smaller trucks and more labor, increasing costs compared to a wide-open lot in a newer development.
- Grading & Soil Compaction: Hawaii Kai has a mix of soil types, from sandy loam near the coast to expansive clay further inland. Proper site grading for drainage and thorough compaction of the sub-base is non-negotiable. If we have to bring in significant amounts of fill or engineered base course material, this can add several thousand dollars to the project.
- Complexity & Thickness: A simple, flat rectangular patio is the most affordable. A driveway with curves, multiple slopes for drainage, or integrated landscape features will cost more due to the complex formwork required. The thickness of the slab also impacts price. A standard 4-inch slab is fine for patios and walkways, but a driveway that will support heavy SUVs or a boat trailer needs to be 5 or even 6 inches thick, which increases material and labor costs by 25-50%.
- Reinforcement: For most applications in Hawaii, steel reinforcement is essential. Standard wire mesh is the minimum, but for structural slabs or driveways on unstable soil, we use a grid of #3 or #4 rebar. As mentioned, in the salt-heavy air of Hawaii Kai, we strongly recommend upgrading to galvanized or epoxy-coated rebar to prevent corrosion, which can add 15-20% to the material cost but vastly extends the life of the concrete.
- Concrete Mix (PSI): Standard residential concrete is typically 2500 or 3000 PSI (pounds per square inch). For a driveway or a structural foundation, we always specify a minimum of 3500 PSI, and sometimes 4000 PSI, especially in coastal areas. Higher PSI mixes cost more but provide superior strength and durability. We might also add admixtures like water reducers for a stronger cure or fiber mesh for crack resistance.
- Finishes: The finish you choose has a huge impact on the final cost. A standard broom finish is the most economical. More decorative options add significant cost:
- Stamped Concrete: Creates patterns like stone or brick. Adds $8-$15 per square foot.
- Exposed Aggregate: A durable, non-slip finish popular for pool decks. Adds $5-$10 per square foot.
- Stained or Colored Concrete: Integral color or acid staining. Adds $4-$9 per square foot.
Cost Examples for Common Projects in Hawaii Kai (2026 Estimates)
To give you a clearer picture, here are some typical all-in project costs:
A concrete foundation Hawaii Kai project for a new home addition (e.g., 600 sq ft) involves much more than just the slab. It includes excavation, footings, reinforcement, and anchor bolts. You should budget between $35 and $50 per square foot, putting a 600 sq ft foundation in the $21,000 to $30,000 range.
For a retaining wall Hawaii Kai project, costs are usually calculated per linear foot and depend heavily on height and soil conditions. A simple 4-foot high concrete masonry unit (CMU) block wall might cost $150-$200 per linear foot. However, an engineered, cast-in-place concrete retaining wall that is 6 feet high and requires deep footings and extensive backfill could easily run $300-$450 per linear foot. A 50-foot wall like this could cost $15,000 to $22,500.
It’s essential to get a detailed, line-item bid from any contractor you consider. If a price seems too good to be true, it almost certainly is. They are likely cutting corners on site prep, reinforcement, or the quality of the concrete itself—shortcuts that will cost you far more in the long run.
How Long Does a Concrete Contractor Take in Hawaii Kai?
This is another question where the answer isn’t as simple as homeowners hope. The actual on-site construction—the demolition, forming, and pouring—is often the fastest part of the process. The biggest variable, and the one that causes the most delays on O’ahu, is the permitting process with the Honolulu DPP. For a typical concrete project in Hawaii Kai that requires a permit, a realistic timeline from the day you sign a contract to the day the project is complete is 3 to 5 months in 2026. Anyone who tells you they can do it in a few weeks is either not pulling permits or isn’t being honest about the current backlog.
Let’s break down a typical project schedule so you can see where the time goes:
- Phase 1: Design & Engineering (1-3 Weeks)
For anything structural like a foundation or a retaining wall over four feet tall, we need engineered plans. We work with a local structural engineer who understands Hawaii’s specific soil and seismic conditions. This phase involves creating detailed drawings that specify the footing dimensions, rebar schedule, concrete strength, and drainage details. For a simple driveway replacement, this phase might just be a day or two of creating a site plan for the permit application. - Phase 2: Permitting (8-16 Weeks… or more)
This is the big one. Once we have the plans, we submit the application to the Department of Planning and Permitting (DPP)[1]. The initial review process in Honolulu is notoriously slow. In 2026, we’re telling clients to expect a minimum of two months for even a simple permit, and four months is not uncommon for more complex projects. There can be back-and-forth with plan reviewers requesting clarifications or changes. A contractor who has a good relationship with DPP staff and knows how to prepare a clean, complete application can sometimes shorten this, but we are all subject to their workload and timelines. This is often the most frustrating period for homeowners, as it feels like nothing is happening, but it’s a critical and unavoidable step. - Phase 3: Site Preparation (1 Week)
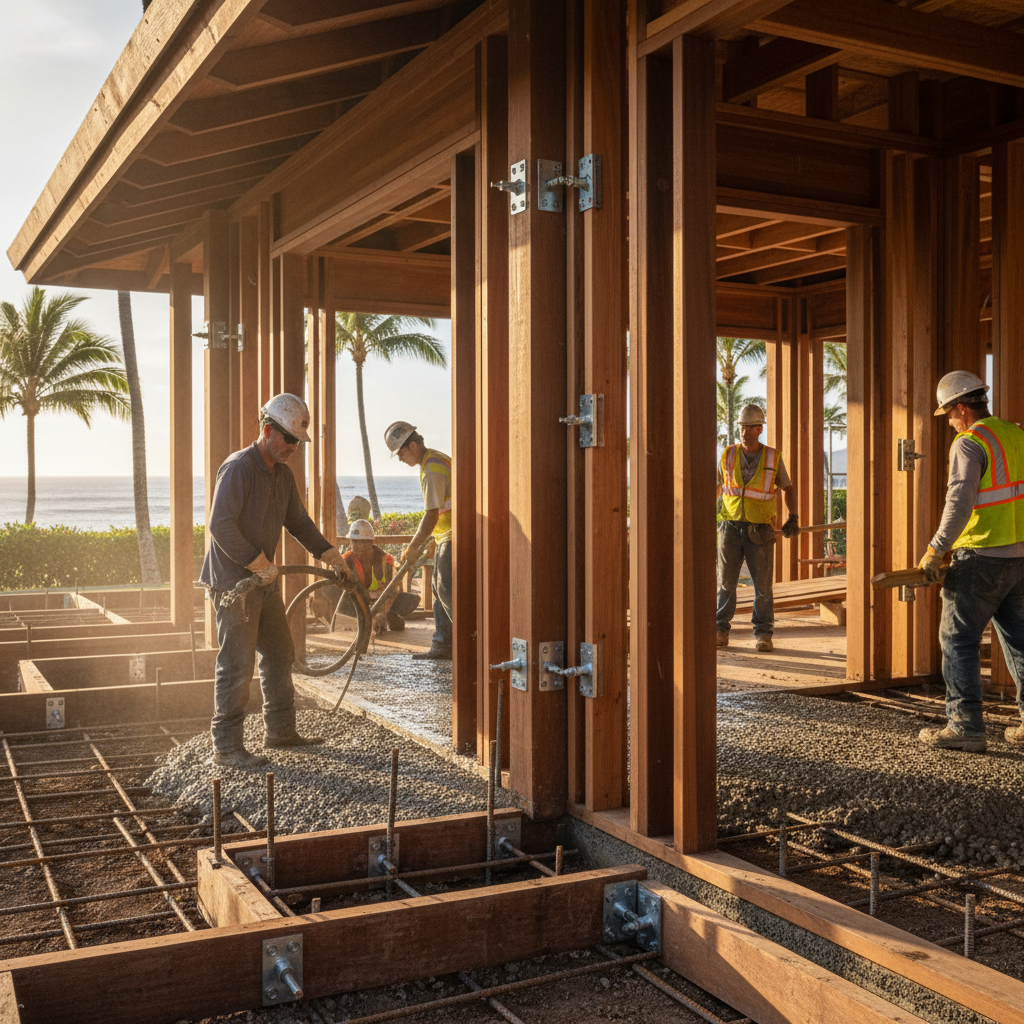
Once the permit is in hand, things move quickly. This phase includes demolition of any existing concrete, clearing and grubbing the area, and initial grading. We’ll also schedule our material deliveries from Hawaiian Cement or other local suppliers. Logistics are key here; we have to coordinate dump trucks for debris removal and deliveries of base course and sand. - Phase 4: Forming & Reinforcement (1 Week)
This is where the craftsmanship really shows. Our crew will build the wooden or metal forms that will contain the wet concrete and create the final shape. We’ll carefully place and tie all the steel rebar according to the engineered plans, ensuring proper spacing and clearance from the edges. A DPP inspector will likely need to visit the site at this stage to inspect the formwork and rebar placement before we’re allowed to pour. This pre-pour inspection is a critical quality control checkpoint. - Phase 5: The Pour & Finish (1-2 Days)
This is the most intense day of the project. We coordinate the arrival of the concrete trucks. The concrete is poured, spread, and screeded level. Then, our skilled finishers get to work. Depending on the desired finish (broom, trowel, stamped), they have a limited window of time to work the surface as it begins to set. Weather plays a huge role; a sudden downpour or intense, direct sun can ruin a pour if not managed correctly. - Phase 6: Curing & Cleanup (4 Weeks)
The concrete might be hard enough to walk on in a day or two, and drive on in about a week, but it doesn’t reach its full design strength for 28 days. Proper curing is vital for long-term durability. This involves keeping the surface moist, especially during the first week, to allow the chemical hydration process to complete. We might use curing compounds or cover the slab with plastic. During this time, we’ll also strip the forms, backfill around the edges, and perform a final cleanup of the site.
As you can see, the actual hands-on work is only a fraction of the total project duration. An experienced concrete contractor in Hawaii Kai manages this entire timeline, keeping you informed at every stage and doing everything possible to minimize delays within a system that has many built-in waiting periods.
What Permits Do You Need for Concrete Contractor in Hawaii Kai?
Navigating the permitting process in Honolulu is one of the most significant hurdles for any construction project, and concrete work is no exception. A common mistake homeowners make is assuming that because a project seems small, it doesn’t require a permit. This can be a costly error, potentially leading to fines, stop-work orders, and even being forced to tear out the completed work. As a licensed general contractor (BC-34373), we handle this entire process for our clients, ensuring everything is done by the book.
The governing body for all construction on O’ahu is the City and County of Honolulu’s Department of Planning and Permitting (DPP). The rules are complex, but here’s a straightforward breakdown of when you’ll need a permit for concrete work at your Hawaii Kai home:
When a Permit is Required:
- New Foundations & Slabs: Any new structural slab that will support a building, like a home addition, a new garage, or a covered lanai, absolutely requires a building permit. This involves submitting full architectural and structural plans.
- Retaining Walls: A building permit is required for any retaining wall that is over four feet high, measured from the bottom of the footing to the top of the wall. Additionally, any retaining wall, regardless of height, that supports a surcharge (like a driveway, a slope, or another structure) also needs a permit and engineered plans.
- Driveways & Flatwork: You typically need a permit if you are creating a new driveway cut onto a city street. If you are simply replacing an existing driveway in the same footprint, a permit may not be required for the driveway itself, but a grubbing and grading permit might be needed if you are moving more than 50 cubic yards of soil.
- Work in a Flood Zone or Shoreline Area: Much of Hawaii Kai is in designated flood zones or near the shoreline. Any work in these areas, including concrete flatwork, often requires additional permits and certifications, such as a Special Management Area (SMA) permit, to ensure the work doesn’t impact drainage or the coastal environment.
When a Permit Might Not Be Required:
- Simple Flatwork Replacement: Replacing a small, non-structural patio or walkway in the same location and dimensions generally does not require a permit, as long as it doesn’t alter the property’s drainage patterns.
- Minor Repairs: Patching cracks or resurfacing existing concrete usually falls under maintenance and does not require a permit.
- Low, Non-Structural Walls: Small landscape walls or garden borders under four feet high that are not supporting any load typically do not need a permit.
The Permitting Process with the DPP
The process of getting a permit from the DPP is methodical and, as we’ve discussed, often slow. Here’s a glimpse into what our team does behind the scenes:
- Plan Preparation: We work with an architect or engineer to create drawings that conform to the city’s building codes. This includes site plans showing property lines and setbacks, as well as structural details for footings and reinforcement.
- Application Submission: We submit the complete application package to the DPP, either online through their portal or in person. This package includes the plans, application forms, and payment of the initial fees.
- Plan Review: The application goes into a queue to be reviewed by multiple departments, including zoning, structural, civil, and sometimes the fire department. Each department checks the plans for compliance with their specific regulations. A plan reviewer may issue comments or corrections that need to be addressed by our engineer before the application can proceed.
- Permit Issuance: Once all departments have approved the plans, the permit is issued. This is the green light for us to begin on-site work.
- Inspections: Throughout the construction process, a city inspector must visit the site at key milestones to verify the work is being done according to the approved plans. For concrete work, this typically includes an inspection of the foundation excavation and a pre-pour inspection of the rebar and formwork. A final inspection is required once the project is complete.
It’s crucial to hire a concrete contractor in Hawaii Kai who is not only licensed but also has extensive experience with the Honolulu DPP. Attempting to bypass this process to save time or money is a recipe for disaster. We ensure every project is fully compliant, protecting you from legal trouble and ensuring the safety and longevity of your investment.
Hawaii Kai-Specific Considerations: Climate, Materials, Regulations
Building in Hawaii Kai isn’t like building anywhere else, not even like other parts of O’ahu. This unique community, built around a marina and nestled between mountains and the sea, presents a specific set of challenges that any competent concrete contractor must master. Overlooking these local factors is the difference between a driveway that looks great for 20 years and one that’s a cracked, spalling mess in five.
The Marine Environment: Salt-Air Corrosion
This is the number one enemy of concrete in Hawaii Kai. The constant onshore breezes carry a fine mist of salt that settles on every surface. This salt penetrates the porous surface of concrete and attacks the steel rebar inside. As the rebar rusts, it expands, creating immense pressure that cracks the concrete from within—a process called spalling. We see it constantly on older properties, especially on lanai railings and retaining walls.
Our Solution: We combat this in several ways. First, we ensure proper concrete cover, meaning the rebar is placed deep enough inside the formwork (typically 1.5 to 2 inches) so the salt has a harder time reaching it. Second, we use higher-strength, less-permeable concrete mixes (4000 PSI is common). Third, and most importantly, we use corrosion-resistant reinforcement. Options include:
- Epoxy-Coated Rebar: A green coating protects the steel from moisture and salt.
- Galvanized Rebar: A zinc coating provides sacrificial protection.
- Stainless Steel Rebar: The ultimate solution, but prohibitively expensive for most residential projects.
We also frequently use a penetrating sealer on the finished concrete to block moisture and salt intrusion, which is a crucial maintenance step for homeowners as well.
Geotechnical Conditions: Volcanic Soil & Drainage
The soils in and around Hawaii Kai can be tricky. You have everything from sandy, well-draining soil near the beach to heavy, expansive clay soils at the base of the ridges. Expansive soils swell when wet and shrink when dry, which can heave and crack a poorly designed concrete slab. On a recent project for a driveway concrete Hawaii Kai home near Koko Head, we had to over-excavate the existing clay soil and replace it with 12 inches of compacted structural fill to create a stable base. Without this step, the new driveway would have cracked within a year.
Proper drainage is also critical. The intense, short-duration rainstorms we get can quickly saturate the ground. Every concrete slab, from a patio to a foundation, must be graded correctly to direct water away from the home. We often incorporate French drains or other drainage systems into our retaining wall and foundation designs to relieve hydrostatic pressure, which is the force of groundwater pushing against a structure.
Hurricane Codes & Structural Integrity
Since Hurricane Iniki devastated parts of Hawaii in 1992, our building codes have become some of the strictest in the nation regarding wind resistance. This directly impacts concrete work. For any new home or addition, the concrete foundation is the anchor for the entire structure. The plans must specify the correct type, size, and spacing of anchor bolts (like Simpson Strong-Ties) embedded in the concrete. These bolts connect the wood framing of the walls directly to the foundation, creating a continuous load path that prevents the house from lifting off its foundation in high winds. A contractor who isn’t meticulous about placing these anchor bolts exactly as specified on the plans is putting the entire home at risk.
Local Regulations and Community Aesthetics (Bill 7)
While not directly a concrete issue, newer regulations like Honolulu’s Bill 7, aimed at curbing monster homes, have an indirect effect. These rules regulate a home’s size and footprint relative to its lot size. When we design a new foundation for an addition or a new home, we must work closely with the architect to ensure our concrete footprint complies with all setback and lot coverage requirements. Furthermore, many neighborhoods in Hawaii Kai have community associations with their own aesthetic guidelines for things like driveway finishes or the appearance of front-facing walls. We always check for these Covenants, Conditions & Restrictions (CC&Rs) before starting work to ensure our project is in harmony with the neighborhood.
Successfully completing a concrete project in Hawaii Kai requires a contractor who is not just a concrete specialist, but also a coastal construction expert, a drainage specialist, and a navigator of local bureaucracy. It’s this holistic, location-specific expertise that defines a true professional.
How to Choose the Right Concrete Contractor Contractor in Hawaii Kai
Choosing the right contractor is the single most important decision you’ll make for your project. A great contractor can make the process smooth and deliver a product that adds value to your home for decades. A bad one can turn your life into a nightmare of delays, cost overruns, and shoddy workmanship. Here is a practical, step-by-step guide to vetting and hiring the best professional for your Hawaii Kai home.
Step 1: Verify License and Insurance
This is non-negotiable. Never, ever hire an unlicensed contractor. In Hawaii, you can verify any contractor’s license on the Department of Commerce and Consumer Affairs (DCCA) Professional & Vocational Licensing (PVL) website[2]. Look for a C-5 (Concrete) or, ideally, a B (General Building Contractor) license, like our Warrior Construction license, BC-34373. A general contractor is licensed to oversee the entire project, including any necessary excavation, drainage, or related trades.
Also, ask for proof of two types of insurance:
- General Liability Insurance: This protects your property from damage caused by the contractor’s work. Ask for a certificate showing at least $1 million in coverage.
- Workers’ Compensation Insurance: This covers the contractor’s employees if they are injured on your property. Without it, you could be held liable.
Step 2: Check for Local Experience and References
Don’t just ask if they’ve worked in Hawaii; ask specifically if they have completed projects in Hawaii Kai. As we’ve discussed, this area has unique challenges. Ask for addresses of recent projects they’ve completed in the 96825 zip code. A good contractor will be proud to show you their work. Take a drive by and look at the quality of the finish and how the concrete is holding up.
Then, ask for at least three references from recent clients—preferably from projects similar to yours. Call those references and ask key questions:
- Was the project completed on time and on budget?
- How was the communication throughout the project?
- Were the job site and crew professional and tidy?
- Were there any unexpected issues, and how did the contractor handle them?
- Would you hire them again?
Step 3: Get Detailed, Written Bids
Get at least three bids from different qualified contractors. Be wary of any bid that is dramatically lower than the others. This is often a red flag that they are cutting corners on materials, don’t carry proper insurance, or plan to hit you with change orders later.
A professional bid is not a one-page summary. It should be a detailed, multi-page document that clearly breaks down the scope of work and costs, including:
- Demolition and debris removal
- Site preparation, grading, and compaction
- Type and thickness of base material
- Thickness of the concrete slab and its PSI strength
- Type of reinforcement (wire mesh, rebar, coated rebar)
- Finishing details (broom, stamped, etc.)
- Allowances for permits and inspections
- A clear payment schedule
Step 4: Review the Contract Carefully
Once you’ve chosen a contractor, they will provide a contract. Read it carefully before signing. A proper contract should include the detailed bid information, a project timeline with start and estimated completion dates, a clear change order process, and lien waiver provisions. In Hawaii, it’s also wise to ensure the contract specifies who is responsible for navigating community association approvals if applicable. Don’t be afraid to ask for clarification on any point you don’t understand. A reputable contractor will be happy to walk you through it.
By following these steps, you can significantly reduce your risk and find a true professional who will be a partner in improving your home. The time you invest in due diligence upfront will pay for itself many times over in the quality and durability of the final product.
Real Hawaii Kai Concrete Contractor Project Example
To bring all these concepts together, let’s walk through a typical project our team at Warrior Construction recently completed in 2025 for a homeowner on Mariner’s Ridge in Hawaii Kai. This project showcases the specific challenges and solutions involved in a retaining wall Hawaii Kai project.
The Client’s Problem: The homeowner had an old, failing railroad tie retaining wall in their backyard that was leaning precariously. The wall was about 6 feet tall at its highest point and 70 feet long. It was not only an eyesore but a serious safety hazard, as it was supporting a significant portion of their sloped yard above the pool deck.
Our Assessment & Plan: During our initial site visit, we identified several issues. The original wall had no proper drainage system, causing hydrostatic pressure to build up behind it after heavy rains. The wood was also severely rotted due to termite damage and moisture. We proposed a complete removal and replacement with a modern, engineered cast-in-place concrete retaining wall designed to last a lifetime.
The Project Breakdown:
- Phase 1: Engineering & Permitting (12 weeks): Because the wall was over 4 feet tall and supporting a surcharge, it required a building permit and plans from a licensed structural engineer. We engaged our trusted engineering partner to design the wall. The design specified a 10-inch thick concrete wall with a deep, 24-inch wide continuous footing. It also included a double mat of #4 epoxy-coated rebar for strength and corrosion resistance. A crucial part of the design was a robust drainage system, including a French drain at the base of the wall and weep holes to relieve pressure. The permitting process with the Honolulu DPP took about 12 weeks from submission to approval.
- Phase 2: Demolition & Excavation (1.5 Weeks): Once we had the permit, our crew carefully dismantled the old wood wall and excavated for the new, larger footing. This was challenging due to the limited access to the backyard. We had to use a mini-excavator to move soil and debris.
- Phase 3: Forming, Rebar & Inspection (1 Week): We built the complex formwork for the new wall and footing. Our team meticulously placed and tied the epoxy-coated rebar according to the engineered plans. We then scheduled and passed the pre-pour footing and rebar inspection with the city inspector.
- Phase 4: The Pour (1 Day): This required a concrete pump truck due to the site access. We poured 25 cubic yards of 4000 PSI concrete for the footing and the wall. Our finishers gave the exposed face of the wall a smooth, clean finish.
- Phase 5: Curing, Waterproofing & Backfill (2 Weeks): After the concrete cured for several days, we stripped the forms. We then applied a heavy-duty waterproofing membrane to the entire back side of the wall to prevent moisture intrusion. We installed the French drain system and backfilled behind the wall with clean drainage gravel, followed by compacted soil.
The Final Numbers:
- Total Project Duration: Approximately 4.5 months (with 3 months of that being the permit wait).
- Total Cost: The all-in cost for the 70-foot long, 6-foot high engineered concrete retaining wall was approximately $29,750. This breaks down to about $425 per linear foot, which is typical for a complex, engineered wall in a difficult-to-access location.
The Outcome: The homeowner now has a beautiful, structurally sound retaining wall that not only secures their property but also enhances the look of their backyard. They have peace of mind knowing it was built correctly to handle Hawaii’s weather and will stand for decades to come.
What this means for Hawaii homeowners
Living in a place like Hawaii Kai offers an incredible lifestyle, but it also comes with unique responsibilities for maintaining your home. The biggest takeaway for any concrete project—whether it’s a foundation, driveway, or retaining wall—is that you cannot cut corners. Our island environment is relentless. The salt, the rain, the sun, and the soil will find any weakness in a poorly executed job.
Here’s the actionable advice our team at Warrior Construction gives to every homeowner before they begin:
- Budget for Quality: Expect to pay more for materials and skilled labor in Hawaii. A bid that seems cheap is a major red flag. Investing in higher-strength concrete, corrosion-resistant rebar, and proper site preparation is not an upsell; it’s insurance against premature failure. Budgeting for quality upfront will save you from catastrophic repair costs later.
- Plan for Delays: The Honolulu permitting process is a reality we all have to live with. Start your planning process well in advance. A realistic timeline of 3-5 months for any project requiring a permit is standard. Be patient and work with a contractor who knows how to navigate the system efficiently.
- Hire a True Local Expert: Prioritize hiring a licensed contractor with a deep portfolio of work specifically in East Honolulu. They will understand the nuances of the marine environment, the local soil conditions, and the specific building codes that apply to your home. Their experience is your best defense against common island-specific problems.
- Don’t Defer Maintenance: For existing concrete, be proactive. Look for small cracks, rust stains (a sign of rebar corrosion), or settled areas. Sealing your driveway every few years can dramatically extend its life. Addressing a small problem today can prevent it from becoming a massive, expensive structural issue tomorrow.
Ultimately, your home’s concrete elements are its foundation, both literally and figuratively. Treating them with the seriousness they deserve, and partnering with a qualified professional who shares that perspective, is the smartest investment you can make in your property’s long-term value and safety.
Frequently Asked Questions About Concrete Contractor in Hawaii Kai
How much does a new concrete driveway cost in Hawaii Kai in 2026?
For a standard 4-inch thick, broom-finished driveway in Hawaii Kai, you should plan to budget between $22 and $28 per square foot. This includes site prep, materials, reinforcement, and labor. For a typical 500 sq. ft. driveway, this comes out to a total cost of $11,000 to $14,000. Costs can increase for thicker slabs, decorative finishes like stamping, or difficult site access.
Do I need a permit to replace my driveway in Hawaii Kai?
Generally, if you are replacing an existing driveway in the exact same footprint and not changing the access point to the street, a building permit is not required. However, if the project involves extensive earthwork (moving more than 50 cubic yards of soil) or alters property drainage, a grading permit from the Honolulu DPP may be necessary. We always verify the specific requirements for each job.
What is the best concrete mix for the salt air in Hawaii Kai?
We recommend a minimum of 3500 PSI (pounds per square inch) concrete, but often specify 4000 PSI for its lower permeability, which helps keep salt and moisture out. More importantly, we advise using corrosion-inhibiting admixtures in the mix and using epoxy-coated or galvanized rebar instead of standard black steel. This combination provides the best long-term protection against spalling in our marine environment.
How long should I wait before driving on my new concrete driveway?
While concrete feels hard within 24 hours, it needs time to cure and gain strength. We recommend waiting a minimum of 7 full days before driving a standard passenger car on a new driveway. For heavier vehicles like large SUVs or trucks, it’s best to wait 10-14 days. The concrete won’t reach its full 28-day design strength for about a month, but it’s safe for light vehicle traffic after a week.
What’s the difference between stamped concrete and exposed aggregate?
Stamped concrete is when we press molds or mats into the wet concrete to create a pattern that mimics stone, brick, or tile. Exposed aggregate is a finish where the top layer of cement paste is washed away to reveal the small, smooth stones (the aggregate) within the mix. Stamped concrete offers more design variety, while exposed aggregate provides a durable, naturally non-slip surface that is very popular for pool decks and walkways.
Why is my existing concrete cracking and showing rust stains?
This is a classic sign of spalling caused by corrosion of the internal steel rebar. Salt and moisture have penetrated the concrete and are rusting the steel. As it rusts, the rebar expands, cracking the concrete from the inside out. This is a serious structural issue that needs to be addressed. Minor spalling can sometimes be repaired, but extensive damage often requires complete replacement of the affected section.
Can you pour concrete in the rain in Hawaii?
Pouring concrete during a heavy downpour is a bad idea, as the excess water can weaken the surface and ruin the finish. However, a light, passing shower is often manageable if the crew is prepared with plastic sheeting to cover the fresh pour. We monitor the weather radar very closely on pour days. If significant rain is forecasted, we will always reschedule the concrete delivery to ensure a high-quality, durable result.
Build with Confidence in Hawaii Kai
Your home is your foundation, and its concrete is the bedrock of that investment. At Warrior Construction, we bring over 20 years of dedicated, on-the-ground experience to every concrete project in Hawaii Kai. We’ve built our reputation on quality, transparency, and a deep understanding of what it takes to build structures that last in our unique island environment. Whether you’re planning a new driveway, a solid foundation for an addition, or a critical retaining wall, our team has the expertise to get the job done right.
If you’re ready to discuss your project, we’re here to provide the expert guidance and skilled craftsmanship you deserve. Learn more about our concrete and foundation services or contact our team today for a comprehensive, no-obligation estimate.