“\n
Hiring a concrete contractor in Mililani in 2026 will typically cost between $25 and $110 per square foot, depending entirely on the project’s complexity—from a simple walkway to a full structural foundation. The most critical decision you’ll make isn’t about the price, but about choosing a licensed, insured contractor who truly understands Oʻahu’s unique soil, climate, and challenging permitting process. Getting this right from the start is the difference between a durable driveway that lasts 30 years and a cracked foundation that causes headaches for decades.
\n\n
As a general contractor here in Hawaii for over 20 years, our team at Warrior Construction has poured more concrete than I can count, from Kapolei to Kaneohe. And I can tell you, the challenges in Mililani are specific. You’re dealing with that classic red volcanic clay soil, which behaves very differently than the sandy soil on the windward side. You’ve also got specific community association rules and a climate that can flip from sunny to a downpour in minutes, right in the middle of a pour. This isn’t mainland construction; this is island-style, and the details matter.
\n\n
This guide isn’t just a list of generic advice. It’s a collection of on-the-ground lessons learned from decades of building on Oʻahu. We’ll break down the real costs you can expect for different projects, navigate the Honolulu Department of Planning and Permitting (DPP), and explain why the ground beneath your Mililani home requires a specific approach. We’ll give you the questions to ask any contractor to see if they really know their stuff or if they just shipped their tools over from the mainland yesterday. Let’s get into it.
\n\n
Why Mililani Homeowners Trust Warrior Construction for Concrete Contractor
\n
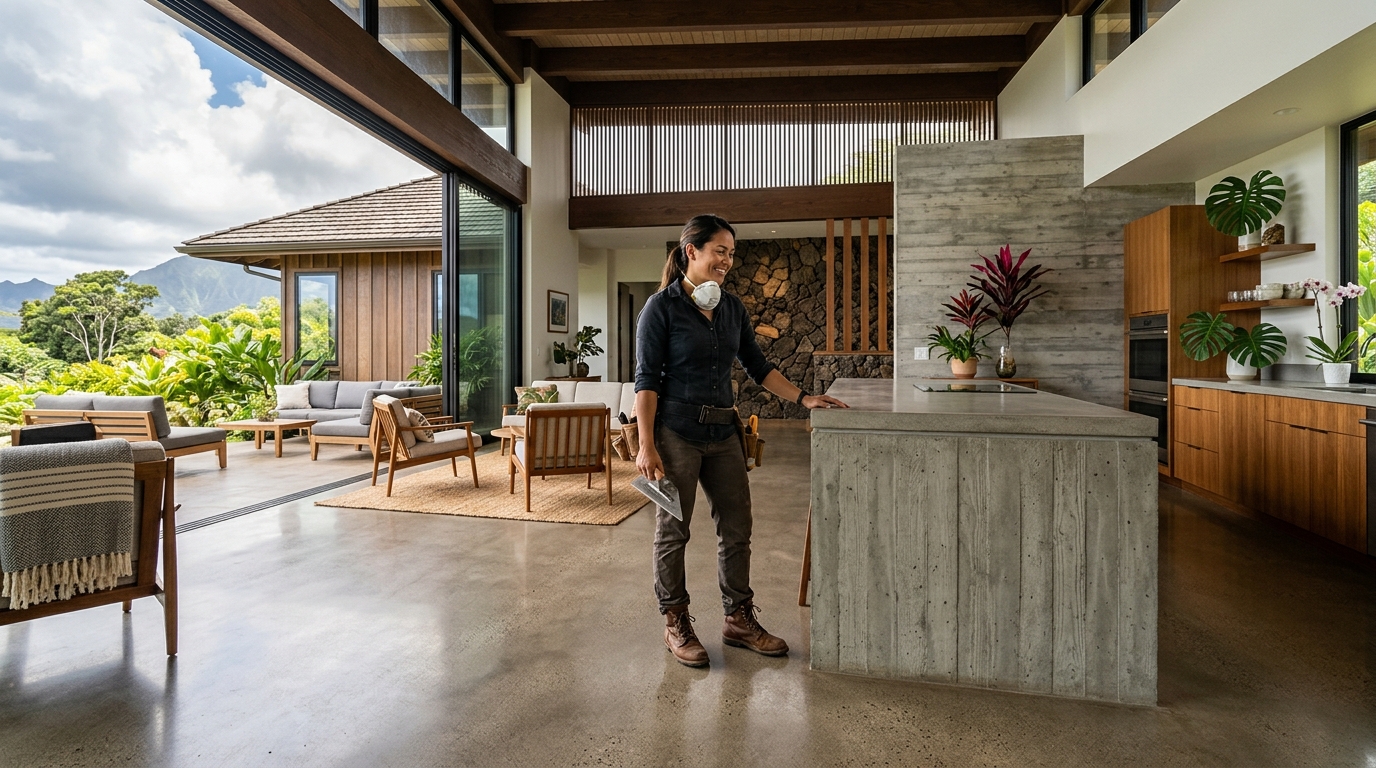
When you need a concrete contractor in Mililani, you’re not just hiring someone to mix cement and water. You’re entrusting them with the very foundation of your property. At Warrior Construction, our license (BC-34373) isn’t just a number on our truck; it’s a promise of accountability and expertise built right here on Oʻahu. Homeowners in Mililani Town and Mililani Mauka choose our team because we have a deep, practical understanding of what it takes to build durable concrete structures in Central Oʻahu, which is a world away from building in Waikiki or on the North Shore.
\n\n
First and foremost, we understand the soil. Mililani’s reddish-brown soil is primarily composed of weathered volcanic ash and rock, creating a clay-like consistency known as Oxisols. This soil can expand significantly when wet and shrink and crack when dry. A mainland contractor might prepare a sub-base the way they would in Arizona, leading to catastrophic failure within a few years. We know that proper site preparation in Mililani means meticulous compaction of the sub-base with imported aggregate and ensuring proper drainage away from the slab to maintain soil moisture consistency. On a recent project for a new ohana unit foundation in Mililani, we spent an extra two days just on sub-grade preparation because the soil was particularly expansive after a wet spring. Skipping that step would have saved a little money upfront but would have guaranteed cracks in the foundation down the line.
\n\n
Local Expertise Beyond the Concrete Mix
\n
Our experience goes beyond the technical aspects of concrete. We have established relationships with local suppliers like Hawaiian Cement and Ameron, ensuring we get priority scheduling for concrete trucks and consistent, high-quality mixes. We know the traffic patterns and plan our pours for the early morning to avoid getting a truck full of hot concrete stuck on the H-1. Furthermore, we’re familiar with the Mililani Town Association (MTA) and its architectural guidelines. If your driveway replacement or new retaining wall is visible from the street, it likely needs to adhere to MTA covenants. Our team is adept at ensuring our projects meet not only the city’s building codes but also your local community’s aesthetic requirements, avoiding potential fines or rework orders.
\n\n
Ultimately, trust is built on a track record of successful projects. Our portfolio showcases our work across the island, and we pride ourselves on clear communication and transparent bidding. When we provide an estimate, it’s not a ballpark guess; it’s a detailed breakdown of costs for materials, labor, permits, and site preparation. Mililani homeowners trust us because we build things the right way, with a deep respect for the unique challenges and beauty of building in Hawaii.
\n\n
What Does Concrete Contractor Cost in Mililani?
\n
Let’s get straight to the point, because this is the first question every homeowner asks. In 2026, the cost for a professional, licensed concrete contractor in Mililani varies based on the type of project. You’re not just paying for concrete; you’re paying for excavation, grading, formwork, rebar, labor, insurance, and the expertise to do it right. Here’s a realistic breakdown of what to budget for common concrete projects on Oʻahu.
\n\n
A simple project like a standard 4-inch thick broom-finished concrete slab for a patio or walkway will typically run between $25 to $35 per square foot. For a 200-square-foot patio, you’re looking at a budget of around $5,000 to $7,000. This includes basic site preparation on a relatively flat lot. If your yard has a slope or requires significant demolition of an old slab, the cost will climb towards the higher end of that range.
\n\n
Cost Breakdown for Common Mililani Concrete Projects (2026 Estimates)
\n
To give you a clearer picture, here are some typical all-in costs for projects we see frequently in the Mililani area:
\n
- \n
- Driveway Concrete Mililani (Replacement): For a standard two-car driveway of about 600 square feet, the cost for demolition, hauling, re-grading, and pouring a new 4.5-inch slab with rebar reinforcement is typically $18,000 to $22,000. This works out to about $30-$37 per square foot. We insist on using a minimum of 3,500 PSI concrete for driveways to handle vehicle weight over time.
- Concrete Foundation Mililani (Slab-on-Grade): For a new home addition or an ADU, a monolithic slab foundation is the most common. For a 600-square-foot addition, the foundation cost, including footings, vapor barrier, termite treatment, and rebar, will be in the range of $27,000 to $36,000, or roughly $45-$60 per square foot. This is a critical structural element, and cutting corners here is not an option.
- Retaining Wall Mililani: Many homes in Mililani, especially in Mililani Mauka, are on sloped lots that require retaining walls. A CMU (concrete masonry unit) block wall, properly engineered with a concrete footing and rebar reinforcement, costs between $150 to $220 per linear foot for a wall that’s 4 feet high. So, a 50-foot long wall could cost between $7,500 and $11,000. Taller walls require more extensive engineering and can cost significantly more.
\n
\n
\n
\n\n
Here’s a quick comparison table to summarize:
\n
| Project Type | Typical Size | Estimated Cost per Sq. Ft. (2026) | Total Estimated Cost (2026) |
|---|---|---|---|
| Walkway/Patio Slab | 200 sq. ft. | $25 – $35 | $5,000 – $7,000 |
| Driveway Replacement | 600 sq. ft. | $30 – $37 | $18,000 – $22,000 |
| ADU Foundation (Slab) | 600 sq. ft. | $45 – $60 | $27,000 – $36,000 |
| Retaining Wall (CMU) | 50 linear ft. (4′ high) | $150 – $220 / linear ft. | $7,500 – $11,000 |
\n\n
These prices reflect the higher cost of doing business in Hawaii. Everything from the aggregate in the concrete to the rebar and even the form boards has to be shipped to the island, which adds a significant amount to material costs. Additionally, our labor costs are higher to ensure we have a skilled, reliable team. Beware of any bid that comes in drastically lower; it often means they are unlicensed, uninsured, or using substandard materials.
\n\n
How Long Does a Concrete Contractor Take in Mililani?
\n
The timeline for a concrete project in Mililani is often dictated less by the physical work and more by the administrative process: permitting. For any project that isn’t a simple, like-for-like repair, you can expect the Honolulu Department of Planning and Permitting (DPP) to be the biggest factor in your schedule. A simple driveway replacement might take two weeks, while a new foundation could be a 6- to 8-month journey from start to finish.
\n\n
Here’s how a typical project timeline breaks down:
\n
- \n
- Design and Planning (2-4 weeks): For structural work like foundations or large retaining walls, you’ll need plans drawn up by a licensed architect or structural engineer. This initial phase involves site measurements, design, and creating the construction documents required for the permit application.
- Permit Submission and Review (4-7 months): This is the longest and most unpredictable phase. Once we submit your plans to the DPP, they go into a queue for review. In 2026, the backlog is still significant. A reviewer might have questions or require revisions, which can add weeks or even months to the process. Our team has extensive experience with the DPP’s system and can often anticipate reviewer comments, but delays are a reality of construction in Honolulu County.
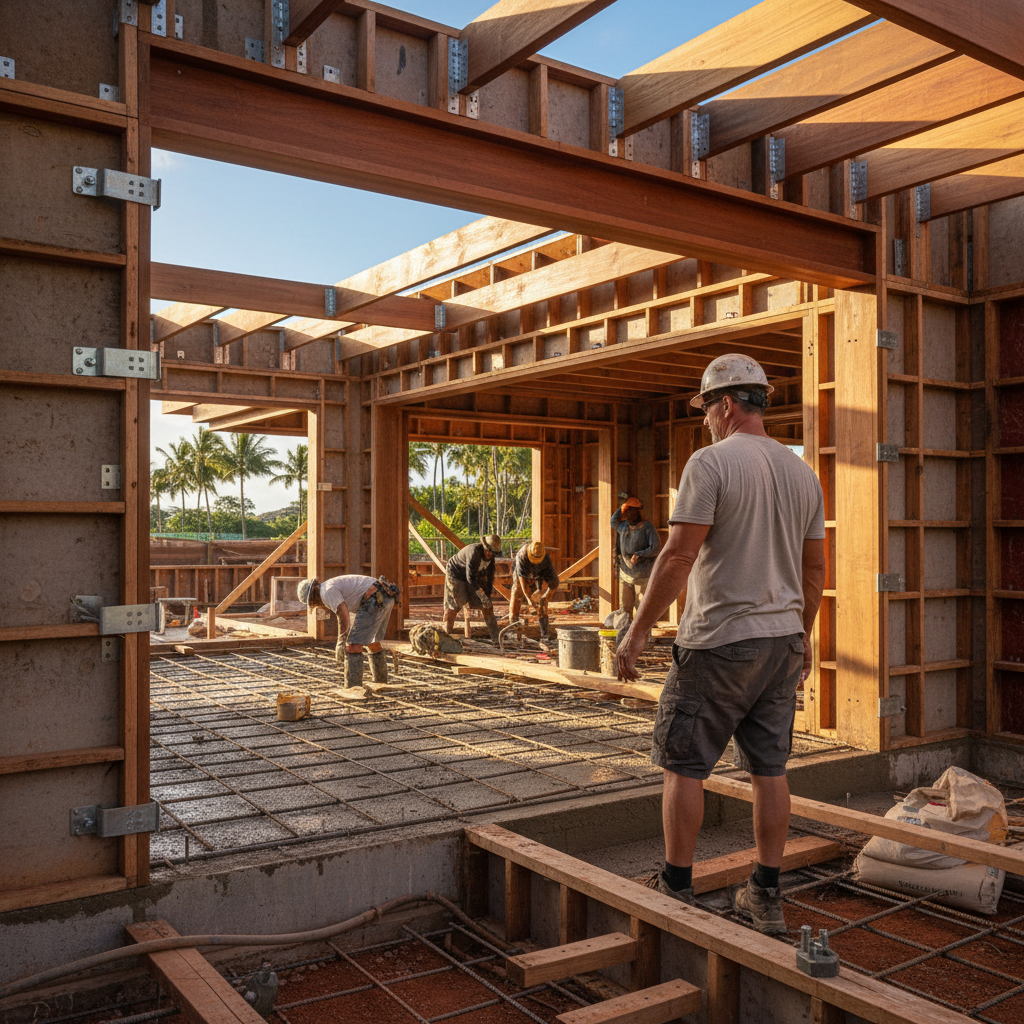
- Site Preparation (1-2 weeks): Once the permit is in hand, the real work begins. This includes demolition of any existing concrete, excavation, grading the soil, and building the wooden forms that will hold the wet concrete. For a foundation, this is also when underslab plumbing and electrical conduits are installed and the ground is treated for termites.
- Inspection, Pour, and Finish (2-3 days): Before we can pour, a city inspector must visit the site to approve the formwork, rebar placement, and sub-base. This is a critical step. After we get the green light, we schedule the concrete trucks. The pour itself usually only takes a few hours. Our finishing crew then works the surface to the desired texture, whether it’s a smooth trowel, a non-slip broom finish, or a decorative stamp.
- Curing (1-4 weeks): Concrete doesn’t “dry”; it cures, which is a chemical hardening process. It’s strong enough to walk on within 24-48 hours, but it takes about 7 days to reach roughly 70% of its final strength and a full 28 days to reach its specified compressive strength (e.g., 3,500 PSI). You shouldn’t drive a car on a new driveway for at least 7-10 days. During this time, we may advise you to keep the surface damp to ensure a proper, strong cure.
\n
\n
\n
\n
\n
\n\n
To put it in perspective, we recently completed a project for a retaining wall in Mililani. The actual construction of the 60-foot wall took our crew three weeks. However, the permit process, including an engineering review due to the wall’s height, took nearly six months. It’s essential for homeowners to have realistic expectations about these timelines. A good contractor will be transparent about the permitting journey and keep you informed every step of the way.
\n\n
What Permits Do You Need for Concrete Contractor in Mililani?
\n
Navigating the permitting process with the City and County of Honolulu’s Department of Planning and Permitting (DPP) is one of the most crucial services a qualified concrete contractor provides.[1] Understanding when a permit is required can save you from massive headaches, fines, and even demolition orders down the road. The general rule is this: if the work is structural or creates a new building footprint, you need a permit.
\n\n
Here’s a breakdown of common concrete projects and their likely permit requirements in Mililani:
\n
- \n
- Driveway/Walkway Replacement: Generally, if you are simply removing an old, cracked driveway and pouring a new one in the exact same footprint and size (“like-for-like” repair), you do not need a building permit. However, if you plan to enlarge the driveway, change its location, or add a new parking slab where there was only grass before, you absolutely need a permit. This is because you are creating new impervious surface area, which affects drainage.
- Patios and Slabs: A detached, on-grade concrete slab for a patio that is less than 200 square feet and not intended to support a structure (like a roof) may be exempt from permitting. However, the moment you plan to put a permanent patio cover or gazebo on it, the slab becomes part of a structure and requires a full building permit. Our advice is always to check with a professional, as the rules can be nuanced.
- Concrete Foundation Mililani: Any new foundation, whether for a custom home, a home addition, or an ADU, requires a building permit. There are no exceptions. The plans must be stamped by a Hawaii-licensed architect or engineer. The DPP will scrutinize the foundation design to ensure it meets building codes for structural integrity, hurricane resistance, and soil conditions.
- Retaining Wall Mililani: A permit is required for any retaining wall that is over 4 feet in height (measured from the bottom of the footing to the top of the wall). Any wall, regardless of height, that supports a surcharge (like a driveway or the foundation of a house) also requires an engineered plan and a permit. We’ve seen homeowners get into serious trouble by building unpermitted 5-foot walls that later failed, causing landslides and property damage.
\n
\n
\n
\n
\n\n
The Permitting and Inspection Process
\n
Getting a permit isn’t just about paperwork. It’s a multi-step process involving plan reviews and on-site inspections. For a foundation project, the process looks like this:
\n
- \n
- Plan Submittal: We submit the engineered plans to the DPP.
- Plan Review: Multiple departments (structural, zoning, drainage) review the plans. This is where the long wait occurs.
- Permit Issuance: Once all departments sign off, the permit is issued and we can begin work.
- Inspections: A city inspector must visit the job site at critical stages. For concrete work, this includes a “footing and steel” inspection before the pour to verify the depth of the footings and the rebar placement. If you fail this inspection, you cannot pour until the corrections are made. A final inspection is required upon completion.
\n
\n
\n
\n
\n\n
A seasoned contractor knows how to prepare the plans and the job site to pass these inspections the first time. This expertise is invaluable and a key reason to avoid hiring someone who wants to do the work without a permit. It might seem cheaper and faster upfront, but the risk of getting caught is enormous and can jeopardize your entire investment.
\n\n
Mililani-Specific Considerations: Climate, Materials, Regulations
\n
Building in Mililani isn’t like building anywhere else, not even compared to other parts of Oʻahu. The specific combination of its inland climate, unique soil, and community regulations creates a set of challenges that a good concrete contractor must master. Simply applying mainland techniques or even Kailua-side practices can lead to poor results.
\n\n
Climate and Weather
\n
Mililani sits in a central valley that gets a healthy amount of rainfall, more than the arid Ewa plains but less than the constantly damp windward coast. This means we have to be strategic about scheduling our concrete pours. A sudden downpour on freshly poured concrete can ruin the surface finish, weakening the top layer and creating a dusty, pockmarked mess. Our team obsessively watches the weather radar. If there’s a significant chance of rain, we won’t pour. It’s better to delay a day than to replace an entire slab. The higher humidity in Mililani also affects curing time, something we factor into our project schedules.
\n\n
Soil and Ground Prep: The Red Dirt Factor
\n
As mentioned before, Mililani’s red volcanic clay soil is the single biggest technical challenge. This soil’s tendency to expand and contract with moisture content can exert immense pressure on a concrete slab from below. If a contractor just levels the existing dirt and pours on top, the slab is guaranteed to heave and crack over time. The correct method, which we employ on every project, involves several steps:\n
- \n
- Over-excavation: We dig out several inches of the native soil.
- Imported Fill: We bring in a structural fill, typically crushed basalt or coral, which is not expansive.
- Compaction: We compact this new base material in layers (called \”lifts\”) using a plate compactor to achieve a minimum of 95% compaction. This creates a stable, non-moving platform for the concrete.
- Vapor Barrier: A thick plastic vapor barrier is laid over the compacted base to prevent ground moisture from wicking up into the concrete, which can cause issues with flooring and promote mold growth inside the home.
\n
\n
\n
\n
\nThis process is labor-intensive and adds cost, but it is absolutely non-negotiable for a long-lasting foundation or slab in Mililani.
\n\n
Termite Prevention
\n
Central Oʻahu is ground zero for subterranean termites. Any new concrete slab poured for a habitable structure must have proper termite protection. This isn’t just a good idea; it’s required by code. We coordinate with a licensed pest control company to establish a chemical barrier in the soil *before* we pour the concrete foundation. This involves treating the entire footprint of the slab and around all plumbing penetrations. Skipping this step is unthinkable for any reputable contractor in Hawaii.
\n\n
Materials and Logistics
\n
All of our concrete comes from local batch plants on Oʻahu. However, getting it to a job site in Mililani Mauka requires logistical planning. We have to coordinate the pour time with the plant and the truck drivers to ensure a steady flow of concrete arrives before the previous batch starts to set. Furthermore, we always specify the correct concrete mix for the job. For a driveway, we use a minimum 3,500 PSI mix with fiber mesh reinforcement. For a structural foundation, it might be a 4,000 PSI mix with a specific rebar schedule designed by a structural engineer to meet current hurricane code requirements.
\n\n
How to Choose the Right Concrete Contractor Contractor in Mililani
\n
Choosing your concrete contractor is the most important decision you’ll make for your project. A great contractor will deliver a product that lasts for decades; a bad one can leave you with a costly and dangerous mess. Here are the key things to look for and the questions you must ask before signing any contract.
\n\n
1. Verify Their License and Insurance
\n
This is the absolute bare minimum. Do not even consider a bid from someone who is not a licensed contractor in the State of Hawaii. You can and should verify any contractor’s license number (ours is BC-34373) on the Department of Commerce and Consumer Affairs (DCCA) Professional & Vocational Licensing (PVL) website.[2] A valid license means they have met minimum experience requirements and have passed exams on law and trade practices. Equally important is insurance. Ask for a Certificate of Insurance showing they carry both General Liability and Worker’s Compensation. If an uninsured worker gets hurt on your property, you could be held liable. If their truck damages your property or the city sidewalk, their General Liability policy should cover it.
\n\n
2. Demand Local, Relevant Experience
\n
Don’t just ask if they have experience; ask if they have experience *in Mililani*. Ask for addresses of recent projects they’ve completed in your area. A good contractor will be proud to show you their work. Ask them specific questions about Mililani’s soil: \”What are your procedures for compacting the sub-base for our expansive clay soil?\” If they can’t give you a confident, detailed answer like the one I described above, they are not the right contractor for the job.
\n\n
3. Analyze the Written Estimate
\n
Never accept a verbal quote or a one-line price on the back of a business card. A professional estimate should be a detailed, written document that breaks down the project scope and costs. It should clearly specify:\n
- \n
- The exact dimensions and thickness of the concrete (e.g., 4.5 inches).
- The compressive strength of the concrete (e.g., 3,500 PSI).
- The type and spacing of reinforcement (e.g., #3 rebar at 18 inches on center).
- Details on site preparation, including demolition, excavation, and base course material.
- The cost of permit processing, if applicable.
- A clear payment schedule.
- An estimated start and completion date.
\n
\n
\n
\n
\n
\n
\n
\nComparing detailed bids like this allows you to see if you’re truly comparing apples to apples. A cheaper bid often omits crucial steps like proper base compaction or uses thinner concrete with less reinforcement.
\n\n
4. Check References and Reviews
\n
Talk to their past clients. Don’t just ask if they were happy with the final product. Ask about the process. Was the crew professional and respectful? Did they clean up the job site every day? How did they handle unexpected problems? Was communication clear and consistent? A contractor’s reputation for professionalism during the project is just as important as the quality of the finished slab.
\n\n
5. Discuss Communication and Project Management
\n
Establish a clear line of communication from the start. Who is your main point of contact? How often can you expect updates? How will change orders be handled? At Warrior Construction, we assign a project manager to every job to ensure our clients always have a direct line for questions and receive regular progress reports. Clear communication prevents misunderstandings and ensures the project runs smoothly.
\n\n
Real Mililani Concrete Contractor Project Example
\n
To make all of this more concrete (pun intended), let’s walk through a typical project our team recently completed in Mililani. This example highlights the common issues and the steps we take to ensure a quality outcome.
\n\n
The Client: A family in a 1980s-era home in Mililani Town.
\n
The Problem: Their original 600-square-foot driveway was a mess. It had several large, spiderweb cracks, and one section near the garage had sunk nearly two inches, creating a constant puddle when it rained and a serious trip hazard. The cause was clear: years of water intrusion into the expansive soil below, combined with an original pour that likely had minimal sub-base preparation and no rebar reinforcement—a common shortcut in older construction.
\n\n
Our Step-by-Step Solution:
\n
- \n
- Demolition and Assessment (Day 1): Our crew started by saw-cutting the old driveway into manageable sections and using a skid-steer loader to break it up and load it into a dump truck for hauling to a recycling facility. Once the old slab was gone, we could clearly see the poor soil conditions underneath.
- Excavation and Re-Grading (Day 2): We excavated 8 inches of the existing red clay soil. We then re-graded the entire area to ensure a proper slope (a minimum of 1/4 inch per foot) away from the garage and house foundation for positive drainage.
- Sub-Base Installation and Compaction (Day 3): We trucked in 4 inches of compacted base course, a specific grade of crushed rock. We laid it down and then used a heavy-duty plate compactor to achieve 95% compaction, creating a solid, stable base that won’t shift or sink.
- Formwork and Reinforcement (Day 4): Our carpenters built the wooden forms around the perimeter of the driveway. We then laid down a grid of #3 rebar, spaced 18 inches apart in both directions and supported by plastic chairs to hold it in the center of the slab once poured. This steel reinforcement is what gives the concrete tensile strength and prevents it from cracking under the load of a vehicle.
- Pour, Finish, and Control Joints (Day 5): With the forms and steel ready, we scheduled an early morning pour. The concrete truck arrived, and we poured a 4.5-inch thick slab of 3,500 PSI concrete. Our finishers immediately went to work, screeding it level and then applying a non-slip broom finish. Crucially, while the concrete was still workable, we cut control joints into the slab to create weakened planes that encourage any future cracking to occur in a clean, straight line rather than randomly across the surface.
- Curing and Cleanup (Week 2): We removed the forms the next day and advised the homeowner to keep the slab lightly misted with water for the next few days to aid the curing process. After one week, the driveway was ready for foot traffic, and after 10 days, they could park their cars on it. Our crew performed a final site cleanup, leaving the property cleaner than when we arrived.
\n
\n
\n
\n
\n
\n
\n\n
Total Project Duration: 1.5 weeks (no permit was required for this like-for-like replacement).
\n
Final Cost (2026): Approximately $19,800, which equates to $33 per square foot for a complete, professional job.
\n\n
What this means for Hawaii homeowners
\n
Understanding the specifics of concrete work in Mililani empowers you to make smarter decisions and protect your investment. The key takeaway is that you are not just buying a slab of concrete; you are investing in a properly engineered system designed for our unique island conditions. Here’s how to apply the information from this guide:
\n
- \n
- Budget Realistically: Use the cost breakdowns provided as a starting point for your 2026 budget. Be wary of any bid that is significantly lower, as it almost certainly means corners are being cut on materials, site prep, licensing, or insurance. That cheap driveway will cost you far more in the long run.
- Plan for Permitting Delays: If your project requires a permit—like a new foundation, an expanded driveway, or a tall retaining wall—factor the 4-7 month DPP review time into your overall project timeline. Do not plan to break ground a month after you hire a contractor. Patience is a requirement for any major construction project on Oʻahu.
- Hire a True Local Expert: When interviewing contractors, treat it like a job interview. Use the knowledge you’ve gained here to ask pointed questions about Mililani’s clay soil, termite treatment protocols, and their experience with the Honolulu DPP. A contractor’s ability to answer these questions confidently is a strong indicator of their competence.
- Insist on a Detailed Contract: Your contract is your primary protection. It must specify the concrete thickness, strength (PSI), reinforcement details, and site preparation methods. Never sign a vague contract or proceed on a handshake deal, no matter how friendly the contractor seems.
- Prioritize Structure Over Aesthetics: While stamped finishes and colors are nice, the most important investment is in what you can’t see: the compacted sub-base, the vapor barrier, and the steel reinforcement. Ensure your budget fully covers these critical structural components before allocating funds to decorative extras.
\n
\n
\n
\n
\n
\n
Ultimately, a well-executed concrete project will add value, function, and safety to your Mililani home for decades. Taking the time to do your research and select a qualified, reputable contractor like Warrior Construction is the most important step in the entire process.
\n\n
Frequently Asked Questions About Concrete Contractor in Mililani
\n
How much does a simple 10×10 concrete patio slab cost in Mililani?
\n
For a basic 100-square-foot (10×10) patio slab in Mililani in 2026, you should budget between $2,800 and $3,800. This assumes a flat, accessible area and includes site prep, a 4-inch thick slab, and a standard broom finish. Costs can increase if demolition of an old slab or significant grading is required.
\n
\n
Do I need an engineer for a retaining wall?
\n
Yes, if the retaining wall is over 4 feet tall (measured from the bottom of the footing) or is supporting a significant load like a driveway or house foundation, you are required by Honolulu building code to have the plans designed and stamped by a Hawaii-licensed structural engineer. For smaller, non-structural garden walls under 4 feet, an engineer may not be required, but it’s always wise to consult a professional contractor.
\n
\n
What PSI concrete is best for a driveway in Hawaii?
\n
We strongly recommend and use a minimum of 3,500 PSI (pounds per square inch) concrete for residential driveways on Oʻahu. While some might suggest 3,000 PSI is adequate, the higher strength provides better long-term durability against the weight of vehicles and our island’s weather conditions. For commercial applications or areas with heavy trucks, 4,000 PSI or more is necessary.
\n
\n
Can you pour concrete if it’s raining in Mililani?
\n
No, a professional contractor will not pour concrete during active rainfall. Rainwater can mix with the surface layer of the wet concrete, increasing the water-to-cement ratio and severely weakening the final product. This can lead to a soft, dusty, or flaking surface. We always reschedule pours if the weather forecast is unfavorable.
\n
\n
How long until I can park my new F-150 on my new driveway?
\n
We advise waiting a minimum of 10 days before parking any vehicles, especially a heavy truck like an F-150, on a new concrete driveway. While the concrete is hard enough to walk on in a day or two, it needs time to cure and gain strength. Parking on it too soon can cause permanent tire depressions or even cracks.
\n
\n
Why is concrete work so much more expensive in Hawaii than on the mainland?
\n
The higher cost is due to several island-specific factors. Virtually all raw materials—cement, aggregate, rebar, and forming lumber—must be shipped across the Pacific, incurring significant freight costs. Additionally, land is at a premium, so material storage and batch plant operations are more expensive. Finally, Hawaii has a higher cost of living, which translates to higher labor wages for skilled workers.
\n
\n
What is the difference between a CMU block and a poured concrete retaining wall?
\n
A CMU (Concrete Masonry Unit) wall is built by stacking hollow concrete blocks and reinforcing them with rebar and grout-filled cells. A poured concrete wall involves building forms and filling them with wet concrete. CMU walls are often more cost-effective for residential projects up to about 6 feet. Poured concrete walls are generally stronger and are preferred for taller, more critical engineering applications.
\n
\n
\n\n
Your home’s foundation, driveway, and walkways are fundamental to its value and safety. Choosing the right partner to build or repair them is critical. At Warrior Construction, we combine decades of local Oʻahu experience with a commitment to quality and transparency. We understand the unique challenges of building in Mililani, from the red clay soil to the DPP permitting maze.
\n
If you’re ready to discuss your project, our team is here to provide a detailed, no-obligation estimate. We’ll walk you through the process, answer your questions, and show you why we’re the trusted choice for concrete work in Mililani and across the island. Let’s build something that lasts.
\n
Ready to start your Mililani concrete project? Get a detailed, professional estimate from our experienced Oʻahu team today.
\n\n
References
\n